Repair Samson Meteor Microphone PCB

How to fix the Samson Mic where USB has come off the PCB.
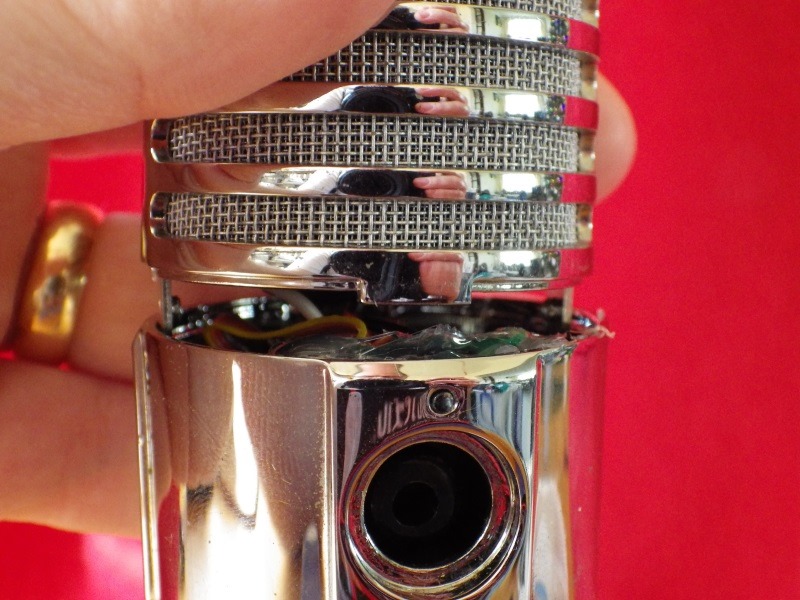
Opening the Samson Microphone
First step is to remove the volume control. Get a firm grip and pull it out of the microphone as shown.

Next open the microphone body. There are two screws, one on each side of the body, unscrew these. The screws go through lugs that descend from the upper microphone body down into the lower body. When you have taken the screws out, be very careful at the next step as the two halves are connected by small tiny wires. The top and bottom should now separate by pulling them apart (no twisting needed). Do this gently and be ready to support both parts as the mic body is HEAVY and if allowed to drop it will pull all the wires off the PCB leaving you with lots more work to do!


In the above photo you can see that the LED PCB support is already missing, this is due to this microphone having being tampered with previously. Yours should have two black hex PCB support pillars between the LED PCB and the other vertical PCB behind it for support.
From now on work very hard to not flex the wiring too much as you work, and don’t allow any force on the wires, they are all tiny and badly soldered by the factory, so they just break off too easily. The black pillar has a large peg in one end and a smaller peg in the other that locates into the whole on the PCB. Use screwdriver or similar to ease the smaller peg out of the whole, one side at a time to get the LED assembly free. Its a difficult balancing act between flexing the PCB too much and needing to get some force to get the thing out. I have not figured out a better way of dealing with this yet.


The LEDS are on the PCB as shown in the last of the above photos. Over the PCB is placed the T shaped light guide, basically a tube of clear plastic that directs the light from the PCB LEDs to the outside via the hole in the case. I’ve included a photo of the back of that PCB, should your wires ping off and you need to know the connections. The T shaped bit locates over the PCB LEDs using the pegs on the bottom of it and the associated holes on the PCB.
The microphone cable has come away in the photo below, it should go between the bodged resistor pcb on the chip and the pad where it is shown attached to in the photo.


I include this photo in case anyone needs to reattach after dropping the microphone when disassembling it…

The above photo shows the very odd positions that I think the microphone attaches to the board. Mine were broken off so I can not be 100% certain this is correct, if anyone has an intact microphone and can verify this for me, do comment below. Soldering one wire to the lower point on the PCB and the other to the exposed wire as shown worked for this microphone though.
Now the top board with the headphone jack on it, is a daughter board, connected by two connectors to the board below it. Simply lift it up to take it out. Below you can see the daughter board, and the board below that it plugs into, after they were removed from the mic body.


Now take out the cross head screws that hold the main board into the body, you can see them here, should be three of them. The main PCB can then be removed.

Now we have the PCB out with the USB connector sheered off the PCB. Clean up the PCB pads that the connector solders to. Don’t worry there only seems to be four pads used.

Put some solder on the pads then clean it off, do the same for the pins on the connector. Then paint some liquid flux on the PCB pads, position the connector, use blue-tak to keep it in position if required, then solder the pads with plenty of solder, let the pins all get joined up. Then use copper braid wick to wick off the excess solder until you have the perfect joint and the pins are no longer connected together. See YouTube for guide videos on surface mount component replacement for help.

Then re-assemble. Take care to line up the pins of the daughterboard before pushing it into place, you don’t want one of the pins missing its hole!
As this mic had a missing PCB pillar for the LED board, and the spacing seemed wrong, I just hot glued it into place.


To put the top back on, locate the lug as shown below, so it is above the volume control, ensuring the side lugs go back into place correctly.

The ribbon cable that connects to the volume control PCB is fragile, after re-soldering it on both sides I got a working microphone!